In this tutorial, we learn how to repair an iPod Nano 4th Generation. First, remove the top and the bottom bezel from the device using a small and flat tool. When these are removed, switches will fall out, make sure to set these aside in a safe area. Now, remove the Philips sc ...more
Is your iPod Nano screen getting a little unclear? Replace it then. Check out this video tutorial on how to take apart your 2nd Generation Apple iPod Nano for not only screen replacement, but for minor repairs also. Anybody can do, but it of course voids your warranty, so try ...more
This how-to video serves as a disassembly guide for MAC's 3rd generation iPod Nano, breaking it down into the pieces: display, battery, logic board, housing, cables, etc. If you're determined to do your own iPod repairs, installations, or modifications, at least follow some ad ...more
This video shows the correct procedure to dismantle a first generation iPod Nano. The presenter starts by using a putty knife (aka the iPod take apart tool) and separates the casing. Next, the presenter removes the battery from the internal circuit board by using a soldering i ...more
In this tutorial, we learn how to take apart an iPod Nano 3rd generation for repair. First remove the back casing using a guitar pick. Next, use a flat tool to lift up the battery carefully and remove it from the casing. You will see three wires that lead to the launch board, ...more
After you've taken your iPod Nano apart and fixed it, you might want to put it back together. Check this video out to see how to assemble the iPod Nano Generation 2 with narration for each step. Check this tutorial out before you attempt your own iPod repairs! And make sure y ...more
PowerBook Medic is the ultimate resource for Mac computers and electronics repair. They have helpful tutorials on most Apple products including the MacBook, MacBook Pro, PowerBook, iBook, iPhone, iPod, and more, covering topics from disassemblies, to RAM upgrades, to replaceme ...more
Learn how to create the 4th Generation iPod Nano in Adobe Photoshop. Sure, you'll only have an image of the 4th generation iPod Nano, but if that's what you need, then this Photoshop tutorial is for you.
This video will show you how to open up iPod Video, Classic, 3rd generation, 4th generation and Nano 1st and 3rd generations. If the Apple warranty no longer covers your iPod, it may be more inexpensive to do simple repairs yourself, instead of purchasing a new iPod. The first ...more
Watch this step by step tutorial how to easily reset an iPod Nano. Toggle the hold switch a few times. Turn off hold switch. Hold down the Menu and Select buttons at the same time. Wait 8 to 10 seconds or until the Apple logo appears. Repeat steps 1-3 if necessary. This also w ...more
In this clip, learn how to access the super secret menus on your iPod Nano, 4th generation. These menus are full of options and different goodies to hack and in this clip, learn how to make your phone go crazy with funky color screens. This hack is super easy and won't harm yo ...more
In this video tutorial, viewers learn how to fix a frozen iPod Nano 4th generation. This technique can be used for any other iPod Nano model or iPod Classic. This method is very simple, fast and easy to do. This video is very basic and only lasts for 17 seconds. To fix the fro ...more
By now you’ve heard about the iPhone 4S announcement, possibly through our article about Apple’s newest smartphone. However, the star of the show was not the only announcement, so here are a few other announcements that were served along side the main entrée this morning. Let’ ...more
This video shows you how to replace the headphone jack and hold switch on a 4th generation iPod. Replace the headphone jack in a 4th generation iPod. Click through to watch this video on ipodhowtovideo.com
This video shows you how to replace the Hard Drive on your 4th Gen iPod in case you're seeing the sad faced iPod or file folder with exclamation point. Replace the hard drive on a 4th generation iPod. Click through to watch this video on ipodhowtovideo.com
Is the battery in your Apple iPod just not up to par? Well, maybe it's time you replaced it with a high capacity battery. These detailed instructions will get you through the difficult, but easy process of doing so. Make sure you observe static safe precautions. Ground yoursel ...more
PowerBook Medic is the ultimate resource for Mac computers and electronics repair. They have helpful tutorials on most Apple products including the MacBook, MacBook Pro, PowerBook, iBook, iPhone, iPod, and more, covering topics from disassemblies, to RAM upgrades, to replaceme ...more
In this how to video, you will learn how to open a 6th generation Ipod Classic. First, make sure to turn it off and make sure the hold button is on. Take a prying tool to undo the clips inside the device by sliding it in between the cover and back. Once the clips are undone, p ...more
This video will show you how to install a battery in a 4th generation iPod, after disassembling the iPod. If the Apple warranty no longer covers your iPod, it may be more inexpensive to do this simple repair yourself, instead of purchasing a new iPod. Watch this video iPod tut ...more
You don't need to make a trip to the Apple Genius bar for something as simple as an iPod battery change. With a new battery, you can start using that dead 4th generation iPod again. Watch this video iPod tutorial and learn how to install a 4th generation iPod battery.
Having trouble opening the fourth generation iPod? Don't give up! Check out this instructional electronics video that illustrates the simple process of opening a 4th generation iPod. This video from ipodjuice.com demonstrates a technique that can be used to open even the most ...more
Learn how to reset a third generation iPod Nano from this video in simple steps. First take your third generation iPod Nano and switch it on. Now press the hold switch at the bottom of the iPod. Now hold the menu button and middle button together for a few seconds. After a few ...more
This video shows you how to disassemble a first generation iPod nano so you can replace the battery. You will need a soldering iron and need to do some electronic soldering so make sure you're comfortable with soldering or have practiced a bit beforehand. Be careful or you'll ...more
Don't pay someone else to replace the battery in your 4th generation iPod, watch this video instead and learn how to do it yourself! The hardest part is removing the battery out so be patient and make sure you have a Torx T-6 screwdriver. Replace the battery in a 4th generatio ...more
Opening an iPod Nano 3rd generation is more difficult than previous models, because of the metal clips. You will need the specialty tool designed to pry open the iPod, before you can get the iPod open and remove the screws. Watch this video iPod tutorial and learn how to insta ...more
This video will show you how to replace the click wheel in a first generation Apple iPod Nano. If the Apple warranty no longer covers your iPod, it may be more inexpensive to do this simple repair yourself, instead of purchasing a new iPod. Watch this video iPod tutorial and l ...more
Check out this instructional electronics video that illustrates the simple process of reconnecting the 4th generation iPod hard drive. The hard drive inside a fourth generation iPod can sometimes come loose from the logic board, but it can easily be reattached. Watch as a tech ...more
Check out this instructional electronics video that illustrates the simple procss of reconnecting the ribbon cable on a 4th generation iPod. Sometimes the ribbon cable that tethers both halves of the fourth generation iPod during the battery replacement process needs to be rea ...more
If you're 3rd generation 8GB iPod Nano has frozen or broken in some other software-related fashion, you probably have to restore it to factory settings. DOH! Fortunately this isn't a hard process, and this video will teach you how to do it.
In this iPod Nano owner's guide, we learn how to use the iPod Nano 5g's built-in video camera. For all of the details, including step-by-step instructions, and to learn how to start shooting digital footage on your own iPod Nano, take a look.
In this how-to video, you will learn now to dismantle an iPod Nano 3rd Generation. First, run a plastic tool on both sides of the device. Once this is done, remove the back cover with your fingers. Next, unscrew the six screws on the circuit board. Store them in a place where ...more
Interested in becoming better acquainted with the sixth version of Apple's popular iPod Nano? This home-computing how-to from the folks at MacMost will teach you everything you'll need to know. For more information, including step-by-step instructions, and to get started using ...more
Check out this instructional electronics video that illustrates the simple process of removing the foam padding of an iPod Photo. In order to get the case to close when installing the battery you may need to remove some of the blue foam padding from the underside of the hard d ...more
The iPod Nano is a great little device, but if you've messed it up somehow you may want to reset it. This video will show you how to do just that on a 3rd generation 8GB Nano, allowing you to change your language settings and other basic options.
Installing the Software Download the PC/Mac client from Dropbox for your computer. When installing the software you will also be prompted to create an account. Please do so at this point. This account gives you free access to 2 gigabytes (gb) of cloud storage that can be acce ...more
This video from Powerbook Medic teaches us how to take apart a 3rd generation iPod. First step is to use a putty knife or a flat head screwdriver to break apart the two pieces. After that remove the headphone cable and set the bottom pan aside. After this, you disconnect the h ...more
Need a little help with your iPod? Has your battery been failing you again and again? Will it not hold a charge? Well, it might be time for you to replace the battery, no? Check out this video tutorial on how to replace the battery in a 4th Generation iPod Photo. Watch and le ...more
Thanks for stopping by to view my Apple Lightning to Micro USB adapter review. The unit comes in a low profile cardboard box and some misc documentation -none of which appear to include any instructions but I think I can figure out how to use it. The adapter is small and well ...more
This video shows you how to replace the LCD Screen & Logic Board on your 4th Generation iPod. If you can pull it off, you'll save yourself a lot of money, just make sure to get the right tools in advance and go slowly! Replace the LCD screen & logic board on a 4th gen iPod. Cl ...more
How to take apart the 1st generation iPod and remove and replace the battery.
This video shows a step by step method for saving money and your iPod when it's battery dies. Take apart the 2nd generation iPod and remove and replace the battery.
iMovie is the basic video editing software on MAC computers, the iPod Touch 4th generation, and the iPad 2. If you're new to film editing or just new to the program in general, this iMovie tutorial is a great introductory course to the program. You'll be run through how to im ...more
n this Video Tutorial we show you how to replace the Click Wheel or Faceplate on your iPod Photo. The click wheel is interchangeable with 4th generation iPods, but the faceplate is not interchangeable. You'll need a pry tool, screwdriver and patience. Replace iPod photo click ...more
Have the first iPod Video version (5th Gen)? After all of those years of use, it might have finally crapped out on you, but don't let Apple or some dealer repair it for more than it's worth, do it yourself. See how to disassemble the Apple iPod Video display and logic board. ...more
You have an iPod Touch, but it's broken. Why spend tons of money to have Apple or some dealer repair it when you can do it yourself? See how to disassemble the iPod Touch. PowerBook Medic is the ultimate resource for Mac computers and electronics repair. They have helpful tut ...more
If you haven't bought one of the new Apple iPod's, you're probably pretty attached to your old one then. Like the iPod Mini. Compared to today's small iPods, it's a clunker, but to you, it's your baby. So if it ever needs fixed, you should do it yourself. See how to disassembl ...more
This video will show you how to remove your old LCD from your 4th generation iPod or iPod Photo and replace it with a new one. If the Apple warranty no longer covers your iPod, it may be more inexpensive to do this simple repair yourself, instead of purchasing a new iPod. Watc ...more
This video will show you how to install a battery or LCD screen in a first generation iPod Nano. If the Apple warranty no longer covers your iPod, it may be more inexpensive to do this simple repair yourself, instead of purchasing a new iPod. Watch this video iPod tutorial and ...more
Learn how to replace the battery in your first generation iPod Nano. There's a reason this is from somebody called "ConsoleZombie," and you'll see why.
How to replace take apart your iPod Nano and repair or replace the screen. A helpful voiceover guides you through the process.
Something amiss with your fifth-generation Apple iPod Nano? Before you send it in for repair, you should reset your iPod to its factory-default settings and see if that doesn't clear up your problem. This iPod owner's guide offers a complete overview of the process.
This video shows you how to replace the LCD screen on a third generation iPod nano. Using a plastic safe pry tool, run it along the edges of the iPod, releasing the clips. Once the clips have been released, you should be able to remove the back cover. There are six exposed scr ...more
This shows you how to save your iPod and a ton of money by fixing a dead battery yourself. Here's how to take apart the 3rd generation iPod and remove and replace the battery.
One problem that happens quite frequently with most Apple iPod products is freezing. Nobody likes a frozen screen, because you can't do anything! Well, if you have an iPod Nano (5th Generation), then this video will show you how to reset and restart it by pressing and holding ...more
This video describes how to take apart a first generation iPod. To open the iPod, the video recommends using a putty knife or similar flat tool to gently ply open the casing. The presenter recommends being especially careful if this is the first time opening the casing. Once y ...more
Want to pump Jay-Z while playing Modern Warfare 3? No probelm. Blast what music you want with help from this how-to video. In this PS3 tutorial, learn how to play music from your iPod through your Playstation 3. This only works with iPods that automatically connect (sync) whe ...more
MyShoppingGenie is an online shopping application that can help you find the best deals on products you search for. It works with major search engines such as Google, Bing, Yahoo! and AOL. It's totally free and simple to setup and use. Once installed, MyShoppingGenie will po ...more
If you need to get into your 2nd generation iPod to replace a part or see what is wrong with it. The best way to take it apart is to use a very thin tool, you will see how to take it apart the 2nd gen iPod using a putting knife. Make sure you release all 4 sides of the iPod be ...more
Apple products can be really expensive for some of us but we can’t live without them, especially the Apple iPods. For those that want to keep their iPods healthy and up to date, it may be a good idea to know the make-up of the interior to get an idea of how you can replace o ...more
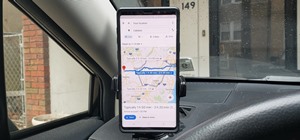
When I heard that Google finally released a maps app for Apple's iOS 6, I almost cried. After upgrading to iOS 6 from iOS 5.1 on my iPhone 4, I was sad to realize that Apple Maps was the new default map app. I don't even have to explain why having Apple Maps as the native mapp ...more